Eat3D - ZBrush 4 Character Production 2 - Creating the Game Model with ZBrush and Maya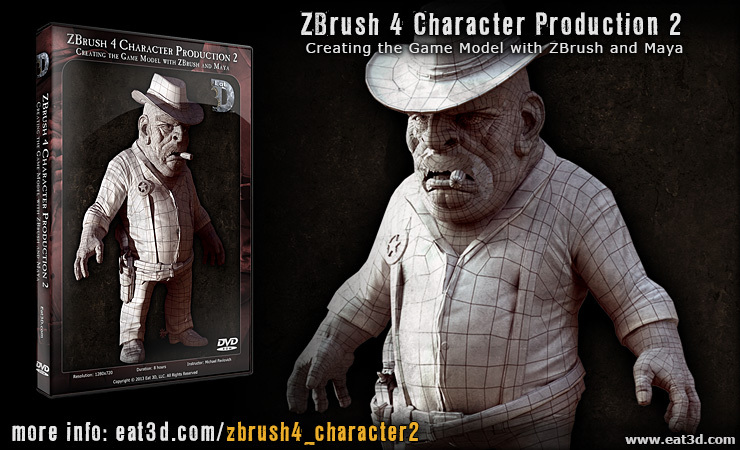 Info
In this DVD, instructor Michael Pavlovich continues where he left off in part 1 to produce a low poly version of the cowboy character to use as a game-res asset. After getting the high-res sculpt organized and ready for rebuilding he goes into several different methods to re-topologize the sculpt. In ZBrush he primarily utilized 2 methods to simplify the sculpt: ZShpere Re-topology and ZRemesher. Michael also sets up a working file to show you how to re-topologize completely in Autodesk Maya; utilizing high-res meshes, reference layers, and live meshes to either clean up previously created geometry or create new topology using polygon modeling tools. He also goes over many tips and tricks to increase your speed and accuracy while re-topologizing in Autodesk Maya. Whether you prefer working in a traditional 3D Package, ZBrush, or a combination of the 2, there will be techniques you can use to get you a final game-res mesh with as little hassle as possible. More information on the product page here: http://eat3d.com/zbrush4_character2 Lynda - VFX Techniques Space Scene 01 Maya Animation and Dynamic Simulation Info
Duration: 3h 8m | Video: AVC (.mp4) 960×540 15fps | Audio: AAC 48KHz 1ch Genre: eLearning | Jan 31 2014 | Level: Intermediate | Language: English Take a journey to another world with Lee Lanier and learn how to animate and render a professional-looking space scene with Maya. In this course the first in a two-part series Lee provides you with two prebuilt models a spaceship and an asteroid which youll keyframe to create a near-miss meeting in an orbit around an alien planet. Youll also add cameras light your scene and set up render layers and mental ray render passes to give the animation color and depth. Last Lee shows you how to focus the ships laser beam on the asteroid shattering its surface with a dynamic simulation and kicking up clouds of space dust with nParticles and then render your results. Topics include: Animating the spaceship and asteroid Animating cameras to follow the action Setting key and fill lights Creating layers for the sun stars and planet Setting up shadow and lighting layers Creating mental ray render passes Exploding geometry in a dynamic simulation Attaching nParticle emitter to bodies Batch rendering render layers HomePage : http://www.lynda.com/After-Effects-tutorials/VFX-Techniques-Space-Scene-01-Maya-Animation-Dynamic-Simulation/155265-2.html Digital Tutors - Interior UV and Texture Tips in Maya Info
In this series of tutorials, we will go over several tips that can help with your interior UV and texturing workflow. We'll start by looking at a basic texture creation workflow using a UV snapshot of our model as a base. We'll learn to adjust and distort textures using several methods in Photoshop to match an existing UV layout. We'll also learn to adjust our UV layout to match an existing texture or image when that is more appropriate We'll also learn to project textures without the need for UVs and learn about tiling smaller texture sections to create a seamless look. We'll discuss tips like hiding seams, using procedural maps, and distorting UV shells to aid in texture alignment. We'll also learn to use Substance to quickly add complex textures and we'll vary the colors of multiple objects quickly using ramps. We won't be texturing a complete project but rather look at a variety of smaller models as we go through several workflow tips that can aid you in your next texturing project. 1. Introduction and project overview 00:00 2. Assembling textures based on UVs 08:35 3. Distorting textures to match a UV layout 08:09 4. Modifying UVs to fit textures 09:00 5. Projecting textures as decals 06:07 6. Tiling smaller texture sections 08:27 7. Hiding UV seams 07:33 8. Modifying textures with the 3D Paint Tool 04:17 9. Coloring multiple objects with a ramp 07:04 10. Using procedural maps 03:58 11. Creating textures with Substance 05:54 12. Laying out UVs to fit texture alignment 05:43 Lynda.com - Creating Hair with Maya nHair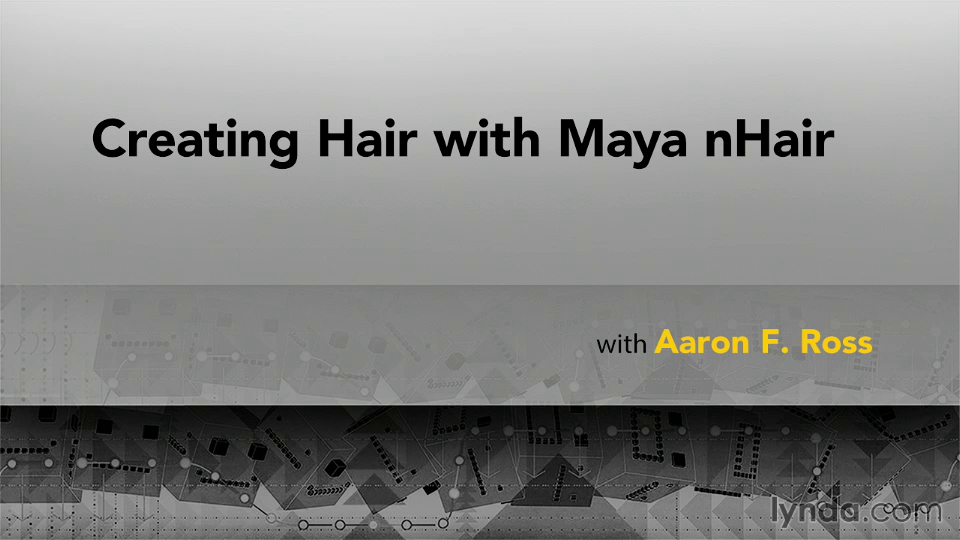
Info
Get tried and true techniques for creating, styling, animating, and rendering hair with nHair in Autodesk Maya. Aaron F. Ross will show you how to prepare your mesh; control for stiffness, shape, and curl; trim and extend follicles; style hair with curves; and adjust color, translucency, and specular highlights. The last chapter shows you how to render nHair with Maya and mental ray. Topics include: Prepping a model for hair Adding nHair Setting dynamic properties Adjusting clump, curl, and twist Painting follicle attributes Creating long hairstyles with curves Applying nConstraints Creating and rendering an nCache http://www.lynda.com/Maya-tutorials/Creating-Hair-Maya-nHair/144855-2.html 3DBuzz - Maya Dynamics
Info
6 Lessons 9+ Hrs MP4 3D Buzz is excited to announce the Maya Dynamics live class! This class continues right where we left off in Maya 101 and is the ideal next step for those who either participated in 101, or already possess a basic understanding of Maya. This class will demonstrate the creation of many different projects from the ground up - but with a focus on camera systems, rigid bodies, soft bodies, nCloth, particles and fluids. Session 1 Cameras Session 2 Rigid Body Session 3 Soft Bodies and nCloth Session 4 nCloth Session 5 Particles Session 6 Fluids Digital Tutors - Creating a Photorealistic Skin Shader in Maya and V-Ray
Info
Duration 2h 26m Level Advanced Project Files Included MP4 Software used Maya and NUKE What you will learn In this tutorial we will learn how to create a photorealistic skin shader using V-Ray and Maya. Throughout these lessons, we will learn the basic building blocks which will aid us in creating a photorealistic skin shader. We will begin by using the VRayFastSSS2 material, exploring its attributes within a simple scene setup. We will then use Photoshop to refine texture maps. As we proceed to more advance lessons, we will apply these building blocks in the process of creating a realistic human skin. By the end of this training you will gain an in-depth understanding of the methodologies involved in using V-Ray fasts SSS2 material to create believable skin shaders. 01. Introduction and project overview 02. Setting up scale and VRayFastSSS2 material 03. Setting up diffuse and SSS layers 04. Looking at the single scatter mode 05. Setting up a V-Ray blend material 06. Setting up V-Ray lights 07. Using V-Ray Dome lights with an HDR map 08. Setting up textures for our VRayFastSSS material 09. Continuing to focus on our color map and textures 10. Adding our normal map and reflection 11. Applying VRayFastSSS material to our CG head 12. Adding a difuse texture 13. Starting to add overall color 14. Setting up our displacement map 15. Looking at linear work flow 16. Preparing our scene for final render 17. Setting up render passes in NUKE Digital Tutors - Populating Complex Environments Using Python in Maya Info
Duration 5h 17m Level Advanced Project Files Included MP4 Software used Maya 2013 What you will learn Throughout these lessons we will examine the process of building custom production tools from an artist's, not an engineer's, perspective. We'll start by establishing basic Python vocabulary. Then we will look at how Python commands can be used to extend the functionality of Maya's existing tool set to create powerful problem solving tools specific to your work. At the end of this tutorial you should feel comfortable with the process of designing, researching, and building your own custom tools. 01. Introduction and project overview 00:41 02. Introducing Python vocabulary 09:38 03. Writing conditional statements and converting variables 10:52 04. Building a simple production tool in Python 10:46 05. Performing actions in Maya to write code in Python 08:32 06. Using a loop to create a series of commands 10:30 07. Adding a user interface to our tools 10:03 08. Using the setAttr and getAttr commands 07:52 09. Creating a directional light with Python 09:31 10. Creating an improved default light rig 06:40 11. Building a procedural stone path 08:03 12. Creating variety with a 'for in' loop to vary the stones 08:47 13. Using a motion path to place the stones 12:28 14. Relating the scale of each stone to offset them from the path 04:00 15. Driving the motion path's U value with the scale of each stone 10:27 16. Using a 'while' loop to run the full length of the curve 06:57 17. Selecting from a variety of stones to duplicate 12:10 18. Randomizing the width of the path 06:27 19. Defining a Python function 04:22 20. Modularizing our tools 12:51 21. Breaking the motion path tool into two separate functions 07:45 22. Path tool with integrated modular motion path tool 06:21 23. Getting user input with the prompt dialog window 05:44 24. Adding a prompt dialog window to the path tool 06:20 25. Scripting shader assignment 09:40 26. Checking object type and listing connections 13:26 27. Shuffling the assignment of our shaders 12:33 28. Creating a custom user interface for our grave yard tool 12:43 29. Randomizing the placement of our hair follicles 10:01 30. Getting the color value of a texture at a given U and V coordinate 08:10 31. Finding a texture that is associated with a piece of geometry 08:24 32. Combing the texture and scale follicle tool 05:12 33. Populating the graveyard 11:27 34. Integrating the shader shuffler into the graveyard tool 12:09 35. Combing the pieces of the graveyard tool into one tool 16:25 3DBuzz - Mastering Maya - The Fundamentals Architecture Info
This series will get you up to speed on Maya's architecture - how the node system can be used to facilitate your modeling! 00:07:49 Introduction 00:17:24 The Two Graphs in Maya 00:20:33 Network Dataflow 00:43:41 Connections 00:04:46 Intro to Utility Nodes 00:19:40 The PlusMinusAverage Node 00:14:12 The MultiplyDivide Node 00:18:12 The Reverse Node 00:09:57 The SetRangeNode 00:05:47 The DistanceBetween Node 00:09:59 The BlendColorsNode 00:21:28 The Condition Node 00:21:32 A Truncation Network 00:24:22 Practical Networks, Pt 1 00:25:18 Practical Networks, Pt 2 Lynda – Cinematography in Maya with Aaron F Ross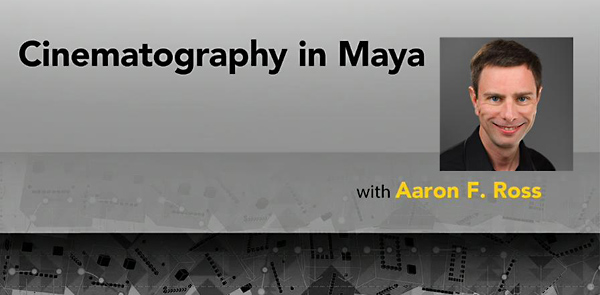 Info
While Maya’s cameras offer you a tremendous amount of creative freedom (even more than real-world cameras), their controls can be complex. This course helps you learn how to expertly adjust them. Aaron F. Ross covers viewport display, controlling orthographic cameras, framing shots, editing with the Camera Sequencer, simple and compound camera moves, and many different special effects. Start now and learn how to expertly position and animate cameras in your Maya projects and give your audience a window into your 3D world. Topics include: * Getting the most out of viewport cameras * Controlling camera attributes such as clipping planes * Setting display options such as Resolution Gate * Adjusting focal length and field of view * Previz editing with the Camera Sequencer * Setting rotation order for predictable camera animation * Animating simple camera moves such as pan and dolly * Mastering compound moves such as crane and handheld shots * Understanding the Film Back attributes * Achieving isometric and tilt-shift effects * Projecting a texture from a camera * Rendering depth-of-field and rack-focus effects Lynda – Learning V-Ray for Maya A Professional Reference Guide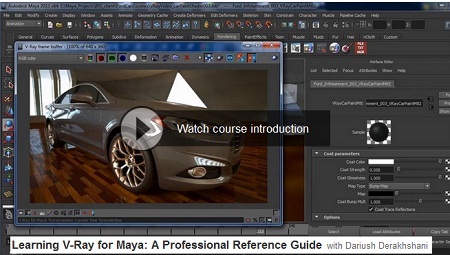 Info
V-Ray for Maya is a powerful rendering software that allows you to have render-time subdivisions, motion blur, and depth of field in your renders. It also offers an innovative global illumination engine. This course covers all the key aspects of V-Ray, from lights and shaders to object properties and render layers, as well as creating passes and elements, and of course rendering and optimizing. Topics include: What is V-Ray? V-Ray integration with Maya UI V-Ray lights and shaders Working with global illumination Object properties and render layers Creating passes and elements Rendering and optimizing Home:_http://www.lynda.com/Maya-tutorials/Learning-V-Ray-Maya-Professional-Reference-Guide/126058-2.html Digital Tutors - Creating Walk Cycles in Maya ↑ Info
Year: 2010 Total time: 02:50:00 What you will learn In this Maya tutorial we will cover the process of creating a Walk Cycle in Maya. One step at a time, we'll break down the body mechanics of a walk. We'll learn the main positions that one goes through in a walk, we'll learn how to create seamless cycles and explore ways we can add convincing follow-through and weight. We'll even work with animation layers to produce a walk that is natural and has a little personality. 1. Introduction and Project Overview 2. Setting up the scene 3. Beginning the Walk Cycle 4. Finishing the Contact Positions 5. Adding the Down Position 6. Completing the extremes of the walk 7. Refining the upper body and feet 8. Balancing the character in the front view 9. Animating the subtle rotations of the feet 10. Animating a toe flap for fluidity 11. Adding weight to the hips 12. Animating the rotations of the upper body 13. Working on the chest 14. Animating the head 15. Correcting the motion of the upper arm 16. Wrapping up the movement of the upper arms 17. The Follow-through and Overlapping Action of the elbows 18. Adding Follow-through to the wrists 19. Finalizing the wrists 20. Refining shoulder movement 21. Finalizing the Walk Cycle 22. Translating a Walk Cycle Forward 23. Utilizing Animation Layers to add more life to the Walk Cycle 24. Smoothing the character via a Custom Attribute http://www.digitaltutors.com/tutorial/354-Creating-Walk-Cycles-in-Maya Digital Tutors - Maximizing Your Wacom Device for Maya 1. Introduction and project overview .mp44.6MB
2. Modifying the Grip Pen properties for Maya .mp424.8MB 3. Customizing your Wacom ExpressKeys.mp440.6MB 4. Using the tablet's Touch Ring or Touch Strip .mp425.8MB 5. Creating a Radial Menu for Maya tools .mp434.2MB 6. Using pressure sensitive features within Maya .mp426.9MBproject files.zip7.1MB ↑ Info http://www.digitaltutors.com/tutorial/878-Maximizing-Your-Wacom-Device-for-Maya Whether you are a 2D or a 3D artist, it is a good possibility that the tablet is a critical piece of hardware in your daily work. However, when it comes to working in Maya, your first inclination may be to put your pen down, and go back to working with your mouse and keyboard. However, this series of tutorials will help you set up the features of your Wacom tablet in a way that is specific to Maya, allowing you to keep your tablet in front of you at all times, and using your tablet to it's full potential. We will learn how your tablet's grip pen, the express keys, the touch strips, and radial menus can all be customized to create a much more intuitive Maya experience. We will conclude this course by exploring some of the tools in Maya that can actually take advantage of the pressure-sensitive nature of our tablet. Digital Tutors - Creating Hairstyles with Maya Hair 1. Introduction and project overview.flv7.0MB
| AuthorWrite something about yourself. No need to be fancy, just an overview. ArchivesCategories |
|
|

 RSS Feed