Digital Tutors - Creating a Photorealistic Skin Shader in Maya and V-Ray
Info
Duration 2h 26m Level Advanced Project Files Included MP4
Software used
Maya and NUKE
What you will learn
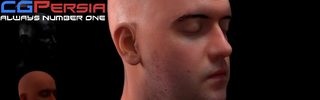
In this tutorial we will learn how to create a photorealistic skin shader using V-Ray and Maya. Throughout these lessons, we will learn the basic building blocks which will aid us in creating a photorealistic skin shader.
We will begin by using the VRayFastSSS2 material, exploring its attributes within a simple scene setup. We will then use Photoshop to refine texture maps. As we proceed to more advance lessons, we will apply these building blocks in the process of creating a realistic human skin.
By the end of this training you will gain an in-depth understanding of the methodologies involved in using V-Ray fasts SSS2 material to create believable skin shaders.
01. Introduction and project overview
02. Setting up scale and VRayFastSSS2 material
03. Setting up diffuse and SSS layers
04. Looking at the single scatter mode
05. Setting up a V-Ray blend material
06. Setting up V-Ray lights
07. Using V-Ray Dome lights with an HDR map
08. Setting up textures for our VRayFastSSS material
09. Continuing to focus on our color map and textures
10. Adding our normal map and reflection
11. Applying VRayFastSSS material to our CG head
12. Adding a difuse texture
13. Starting to add overall color
14. Setting up our displacement map
15. Looking at linear work flow
16. Preparing our scene for final render
17. Setting up render passes in NUKE
Duration 2h 26m Level Advanced Project Files Included MP4
Software used
Maya and NUKE
What you will learn
In this tutorial we will learn how to create a photorealistic skin shader using V-Ray and Maya. Throughout these lessons, we will learn the basic building blocks which will aid us in creating a photorealistic skin shader.
We will begin by using the VRayFastSSS2 material, exploring its attributes within a simple scene setup. We will then use Photoshop to refine texture maps. As we proceed to more advance lessons, we will apply these building blocks in the process of creating a realistic human skin.
By the end of this training you will gain an in-depth understanding of the methodologies involved in using V-Ray fasts SSS2 material to create believable skin shaders.
01. Introduction and project overview
02. Setting up scale and VRayFastSSS2 material
03. Setting up diffuse and SSS layers
04. Looking at the single scatter mode
05. Setting up a V-Ray blend material
06. Setting up V-Ray lights
07. Using V-Ray Dome lights with an HDR map
08. Setting up textures for our VRayFastSSS material
09. Continuing to focus on our color map and textures
10. Adding our normal map and reflection
11. Applying VRayFastSSS material to our CG head
12. Adding a difuse texture
13. Starting to add overall color
14. Setting up our displacement map
15. Looking at linear work flow
16. Preparing our scene for final render
17. Setting up render passes in NUKE
 RSS Feed